


Tiled Shower Surround Grout Maintenance Tip
I think it’s fair to say most people would prefer the aesthetics of ceramic tile on their shower surround verses fiberglass or plastic. Ceramic tile comes in many different colors, shapes, and textures that will provide you with the look and feel that you desire, but with that comes extra maintenance as compared to a standard fiberglass surround.
I like to think of the standard white fiberglass shower surrounds as practical, easy to install, very durable, and require virtually no maintenance other than cleaning. Ceramic tile will generally cost more, is more difficult to install, and will require periodic maintenance to the grout between the tiles, but will provide a very nice look to the bathroom.
This is a picture that I took at a home inspection in Minneapolis Minnesota. As you can see the grout is starting to crack in the corner, this is the most common place for cracks to show up due to movement in the wall structure behind the tile and because grout was used 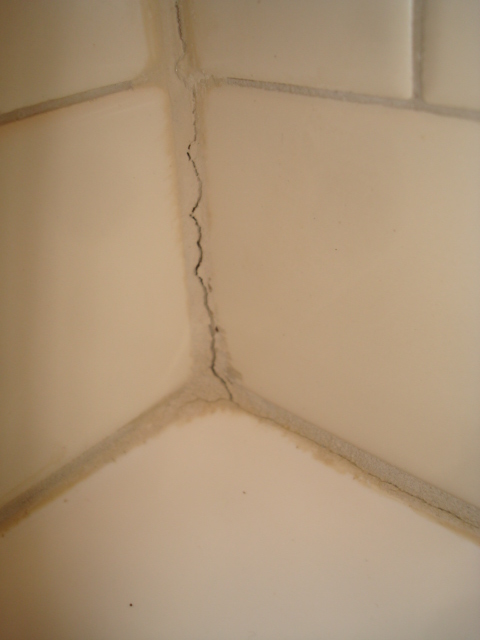 in the corners instead of silicone caulk. Using caulk in the corners is recommended because it will flex with the movement of the house, however, most of them are grouted. Keep in mind that cracks can show up at any time and in any location.
Cracked grout equals water seeping into the wall behind the tile. If left long enough problems such as tiles falling off, mold growth, and in extreme cases water will find its way down the wall damaging other wall or ceiling surfaces.
When you inspect your tile and find cracks I don’t recommend you tear off all your tile to see if there’s damage to the wall surface unless your tile looks similar to this.
In most cases performing some simple maintenance will greatly extend the life of your shower surround.
- Using a utility knife scrape out all the loose grout.
- Remove all the old caulk with a razor blade
- If possible do not use the shower for several days to dry out any water that may have seeped in.
- Mix up new grout that is the same color as the old grout according the manufactures instructions and fill in the area’s you scraped out.
- Wipe off the excess grout with a sponge
- Re caulk the corners, where the tile meets the tub, and where the tub meets the bathroom floor using a silicone based caulk that is mold resistant.
- Clean the old excising grout, this will help match the color of new grout and will help the sealer to last longer.
- Apply a grout sealer to the old and new grout to prolong its life, re apply every couple of years.
If you don’t feel this is a job you can handle then hire it out. The money spent will pay off in the long run. Many problems found in homes start out small, and if left alone, turn into large expensive problems. Damaged grout definitely falls into that category.
Pete Busch
Minnesota Home Inspector
763 442 4039
